
In an era dominated by digital transactions, the humble personal check still holds significant relevance, whether for specific payments, gift-giving, or simply as a backup. While newer software versions abound, many individuals and small businesses continue to rely on older, familiar tools. For those who find themselves needing to generate their own physical checks using legacy software, mastering the creation of a Personal Check Template Word 2003 can be an invaluable skill, offering a cost-effective and flexible solution to their payment needs. This guide will walk you through the intricacies of designing and utilizing such a template, ensuring your checks are both functional and compliant.
The convenience of creating your own checks at home extends beyond simple cost savings. It provides an immediate solution for unexpected needs, allows for personalized branding for small ventures, and offers a level of control over the design that pre-printed checks cannot match. However, it's crucial to approach this task with a clear understanding of the necessary elements and the technical limitations of the software.
While Microsoft Word 2003 might seem outdated to some, its robust features for document creation, including tables, text boxes, and precise formatting controls, make it perfectly capable of handling this specific task. The key lies in understanding how to leverage these tools effectively to replicate the precise layout required for a valid bank check. This article will delve into the practical steps, essential components, and important considerations to ensure your self-generated checks are accepted without issue.

We will cover everything from setting up your document and designing the core elements to understanding the security implications and ensuring proper printing. By the end of this comprehensive guide, you will be equipped with the knowledge and steps to confidently produce your own personal checks using the Microsoft Word 2003 platform, bridging the gap between digital convenience and the enduring need for paper-based transactions.

Why Create Your Own Personal Checks?
The idea of printing your own checks might seem unusual in a world moving towards digital payments, but there are several compelling reasons why individuals and small businesses still opt for this method. Understanding these benefits can highlight the enduring utility of a personal check template.
Firstly, cost-effectiveness is a major driver. Traditional banks often charge significant fees for ordering new checkbooks, especially for custom designs or small quantities. By creating and printing your own checks, you can drastically reduce these expenses, paying only for the paper and ink. This is particularly beneficial for those who only use a few checks a year.

Secondly, the ability to create checks on demand offers unparalleled convenience and immediacy. If you suddenly run out of checks or need a unique check for a specific purpose, you don't have to wait days or weeks for a new order to arrive from your bank. You can simply print one as needed, saving time and potential late fees.
Thirdly, customization and branding are significant advantages for small businesses or individuals who want a personalized touch. While banks offer limited design options, a self-created template allows you to incorporate your business logo, unique fonts, or specific background designs, enhancing your brand identity or making your personal checks stand out.
Finally, for those who use legacy software like Word 2003, mastering this skill provides a self-sufficient solution that doesn't require upgrading software or learning new platforms. It leverages existing resources and expertise, making it a practical choice for many. While security considerations are paramount, the flexibility and control offered by DIY check printing are undeniable benefits.
Understanding the Essential Components of a Bank Check
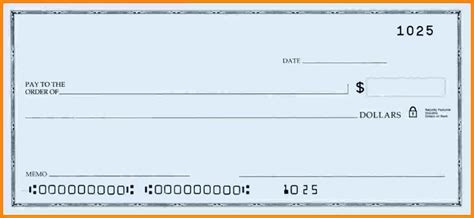
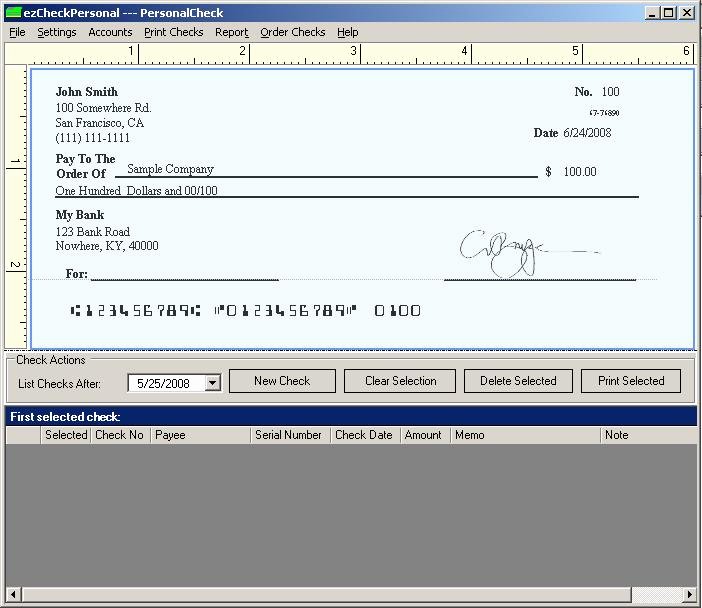
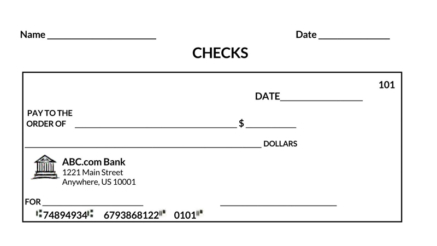
Before diving into the creation of your Personal Check Template Word 2003, it's crucial to understand the anatomy of a standard bank check. Each element serves a specific purpose, and its accurate placement is vital for the check to be accepted and processed correctly by financial institutions.

Every check typically includes the following key components:

- Date: Usually located in the top right corner, indicating when the check was written.
- Payee Line: A line where you write the name of the person or entity receiving the payment, often starting with "Pay to the Order of."
- Numeric Amount Box: A small box next to the payee line where the payment amount is written in figures (e.g., "$100.00").
- Written Amount Line: A line below the payee line where the payment amount is written out in words (e.g., "One Hundred and 00/100 Dollars"). This is a crucial security feature, as it's harder to alter.
- Your Name and Address: Located in the top left corner, identifying the account holder.
- Bank Name and Address: Typically printed below your name and address or elsewhere on the check.
- Memo Line: An optional line, usually in the bottom left, for a brief note about the payment (e.g., "Rent," "Invoice #123").
- Signature Line: A line in the bottom right where the account holder signs the check, authorizing the payment.
- Check Number: A unique serial number, usually in the top right and bottom left, allowing for easy tracking.
- Routing Number (ABA Transit Number): A nine-digit number, part of the Magnetic Ink Character Recognition (MICR) line at the bottom, identifying your bank.
- Account Number: Your specific bank account number, also part of the MICR line.
- Fraction/Transit Number: Sometimes found near the date or bank details, it's a fractional representation of the routing number.
Accurately replicating these elements in your Word 2003 template is paramount. The MICR line, in particular, requires careful attention as it contains machine-readable information critical for automated processing.

Creating Your Personal Check Template Word 2003: A Step-by-Step Guide
Designing a functional Personal Check Template Word 2003 involves meticulous planning and execution. While Word 2003 might lack some of the more advanced features of newer versions, its core functionalities are perfectly adequate for this task.

Step 1: Set Up Your Document and Page Layout
- Open Microsoft Word 2003: Start a new blank document.
- Page Setup: Checks typically measure 6 inches wide by 2.75 inches tall. You'll likely print three checks per standard 8.5 x 11-inch sheet of paper.
- Go to
File > Page Setup. - Under the
Paper Sizetab, selectCustom size. - For width, you could set it to 8.5 inches and height to 11 inches (for a full sheet) or you can create individual check-sized documents and arrange them later or use tables for precise positioning. For simplicity and printing multiple checks, it's often easier to design within a standard letter-sized page using tables or text boxes.
- Set Margins to very narrow (e.g., 0.25 inches all around) to maximize usable space. Go to
File > Page Setup > Margins.
- Go to
Step 2: Design the Check Layout using Tables or Text Boxes
The most effective way to structure your check is by using a table. This allows for precise alignment of text and fields.

- Insert a Table: Go to
Table > Insert > Table.- You'll likely need a single row, multi-column table, or a series of nested tables, depending on the complexity. A good starting point is a 3-column, 2-row table for the main structure, then adding more rows/columns as needed within those cells.
- Alternatively, you can use text boxes (
Insert > Text Box) and position them manually, though this can be harder to align perfectly.
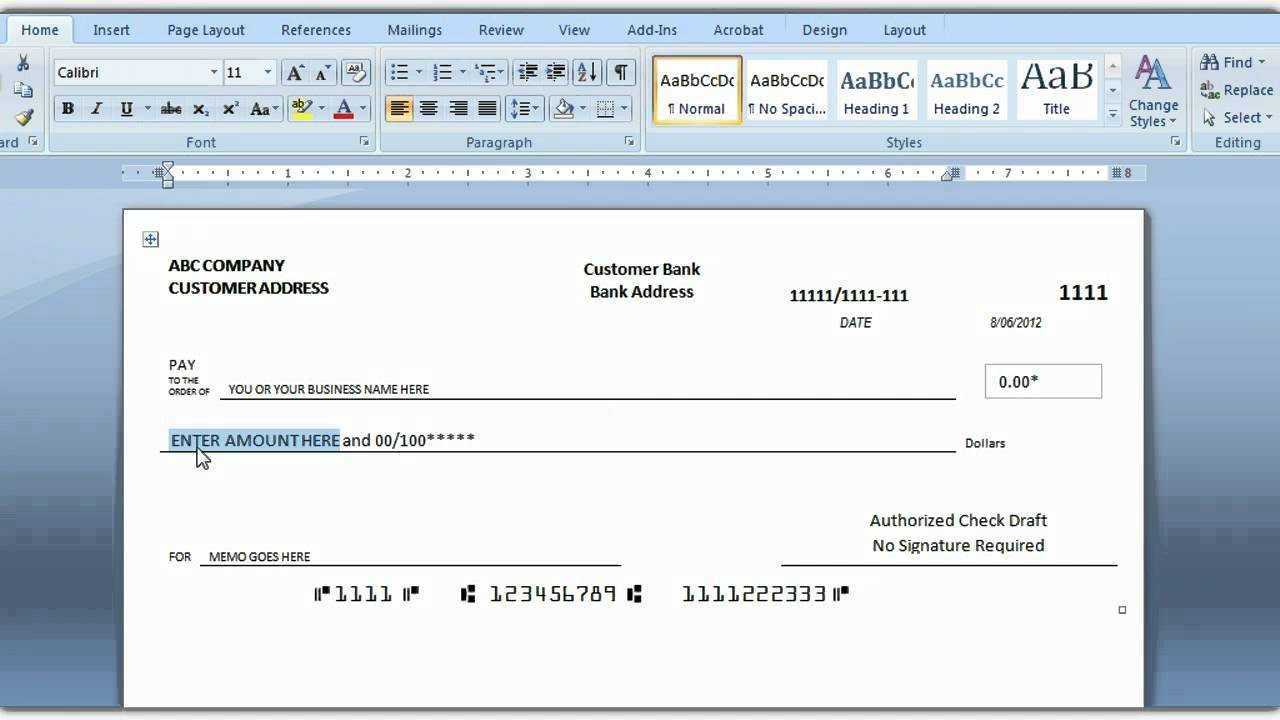
Step 3: Add Essential Check Fields
Now, populate your table cells or text boxes with the required information.
- Your Information: In the top-left cell, type your name, address, and phone number. Choose a professional, legible font.
- Date Field: In the top-right cell, insert a space for the date. You can type "Date: _" or leave a blank line.
- Check Number: Place this in the top-right, just below the date, and also in the bottom-left corner. For the template, use a placeholder like "No. 0001" which you will increment manually for each check.
- Payee Line: In a central, prominent cell, type "Pay to the Order of _".
- Numeric Amount Box: Create a small, bold box to the right of the payee line. You can achieve this with a small table cell with borders, or a text box with a border. Type a dollar sign "$" inside.
- Written Amount Line: Below the payee line, type "__ Dollars".
- Bank Information: In a central position, usually below your name, type your bank's name and address.
- Memo Line: In the bottom-left, type "Memo: ___".
- Signature Line: In the bottom-right, type "_".
Step 4: Incorporate the MICR Line
This is the most critical and sensitive part. The MICR (Magnetic Ink Character Recognition) line at the bottom of the check contains your bank's routing number, your account number, and the check number.
- Use a Specific Font: Financial institutions use a special font called MICR E-13B for these numbers. While you likely won't have this font installed on Word 2003, you can use a close alternative like OCR-A Extended or a similar monospaced font that appears very clear and machine-readable. Ensure your bank can still process it.
- Format: In a dedicated space at the very bottom of your check template (a separate table cell or text box), type the numbers in the correct sequence:
- Routing Number: Your bank's 9-digit routing number.
- Account Number: Your personal bank account number.
- Check Number: The sequential number of the check.
- Example format:
C123456789C A987654321A 0001P(The 'C', 'A', 'P' are special transit symbols in the MICR line; verify these with your bank or an existing check).
- Accuracy is Paramount: Double-check these numbers against an existing check from your bank. Any error here will render the check unusable.
Step 5: Formatting and Fonts
- Choose Professional Fonts: Stick to clear, legible fonts like Arial, Times New Roman, or Calibri (if available in 2003). Avoid overly decorative fonts.
- Font Sizes: Use appropriate sizes. Your name might be 10-12pt, date 8-10pt, and MICR line 10-12pt.
- Borders and Shading: Use table cell borders to define sections clearly. You can add very light shading to specific areas if desired, but keep it minimal to avoid obstructing information.
- Logos: If including a personal or business logo, ensure it's high quality and fits neatly without obscuring other information.
Insert > Picture > From File.
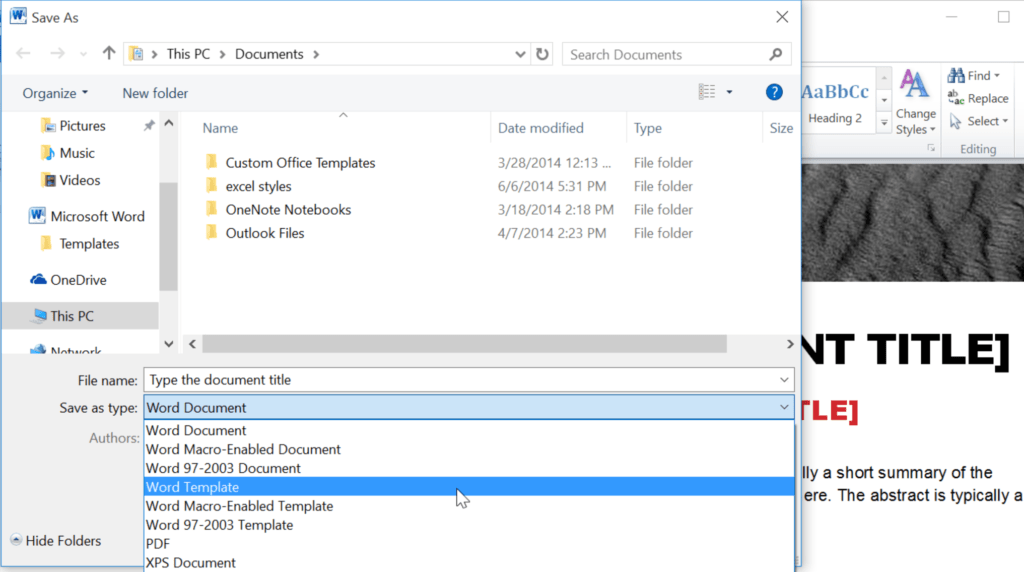
Step 6: Saving Your Personal Check Template
- Save as a Template: To reuse your design without accidentally altering the original, save it as a Word template.
- Go to
File > Save As. - In the
Save as typedropdown menu, selectDocument Template (*.dot). - Give it a descriptive name like "Personal Check Template Word 2003".
- Word will typically save it to the default templates folder.
- Go to
- Print a Test Copy: Before printing on special check paper, print a few copies on plain paper to check alignment, font sizes, and overall appearance. Compare it side-by-side with an existing check.
This meticulous approach ensures that your Personal Check Template Word 2003 is not only visually appealing but also fully functional and compliant with banking standards.

Key Elements for Your Personal Check Template Word 2003
To ensure your homemade checks are legitimate and processable, every Personal Check Template Word 2003 must meticulously include several critical pieces of information. Missing or incorrectly formatted elements can lead to a check being rejected by the bank, causing delays and potential fees.

Here's a checklist of the absolutely essential elements you must incorporate:
- Your Legal Name and Current Address: Clearly printed in the top left corner. This identifies the account holder.
- Financial Institution's Name and Location: Your bank's name and its city/state should be prominent, typically below your information or in a central location.
- Check Number: A unique serial number. Ensure it appears in at least two places: usually the top right and within the MICR line at the bottom. Start with '0001' or a higher number if you've already used previous checks, and remember to increment it for each new check you print.
- Date Line: A clear space for the date the check is written, typically in the top right.
- Payee Line: The "Pay to the Order of" line where the recipient's name is written.
- Numeric Amount Box: A clearly defined box for the dollar amount in figures (e.g., "$XXX.XX").
- Written Amount Line: The line where the dollar amount is spelled out in words, followed by "Dollars." This line is crucial for security.
- Signature Line: The space for the account holder's legal signature. Without a signature, the check is invalid.
- Bank Routing Number: The 9-digit American Bankers Association (ABA) routing transit number, uniquely identifying your bank. This is a critical part of the MICR line.
- Your Bank Account Number: Your specific account number with the financial institution, also part of the MICR line.
- MICR Line Format: The entire string of numbers at the bottom (routing number, account number, check number) must be correctly sequenced and, ideally, in a MICR E-13B compliant font (or a very close alternative) for machine readability.
Beyond these essentials, you might consider adding a memo line for optional notes, which can be helpful for record-keeping. The overall layout should be clean, uncluttered, and professional, mirroring the appearance of checks issued directly by your bank. Regular comparison with an official check is highly recommended during the template design process.
Legal, Security, and Practical Considerations
While creating a Personal Check Template Word 2003 offers flexibility, it comes with significant legal and security responsibilities. It's crucial to be aware of these aspects to avoid potential fraud, banking issues, or legal repercussions.
Legal Compliance
- Banking Regulations: Banks in the U.S. adhere to specific standards for check processing, largely governed by the Federal Reserve and the Uniform Commercial Code (UCC). While minor design variations are usually acceptable, the core elements (routing number, account number, check number, amount, date, payee, signature) must be present and readable.
- MICR Line Accuracy: The most critical component is the MICR line. Errors here will cause checks to bounce or be rejected, potentially incurring fees for both you and the recipient. The numbers must be exact and the formatting as close to standard as possible.
Security Concerns
- Fraud Risk: Homemade checks, especially if printed on regular paper, are inherently more susceptible to fraud than bank-issued checks with security features.
- Security Paper: To mitigate fraud, consider purchasing blank check stock paper which often includes built-in security features such as microprinting, watermarks, chemical alteration protection, and toner adhesion for laser printers. This specialized paper is available from office supply stores or online.
- Secure Storage: Your template and any blank checks you print should be stored securely to prevent unauthorized access and use.
- Printer Quality: Ensure your printer produces clear, crisp text, especially for the MICR line. Blurry or faded numbers can lead to processing errors.
- Signature Security: While Word 2003 allows inserting images, never pre-print your signature on checks. Always sign them manually after printing.
Practical Tips for Printing and Usage
- Test Prints: Always print a test copy on plain paper before using expensive check stock. Verify all alignment, font sizes, and data against an official bank check.
- Ink Quality: Use high-quality printer ink that won't smudge or fade easily. Pigment-based inks are generally more durable than dye-based inks.
- Record Keeping: Keep meticulous records of all checks printed and written, including the check number, date, payee, and amount. This is vital for balancing your checkbook and resolving discrepancies.
- Bank Policy: While generally accepted, it's wise to check with your bank regarding their specific policy on self-printed checks. Most modern banks process them, but understanding any particular requirements they might have can save future headaches.
- Never Share the Template: Treat your Personal Check Template Word 2003 with the same security as your bank account details. Do not share it or leave it on unsecured computers.
By taking these legal, security, and practical considerations seriously, you can confidently and responsibly leverage your ability to create custom checks using Word 2003.
Alternatives and Modern Solutions
While mastering the Personal Check Template Word 2003 is a valuable skill for specific circumstances, it's also important to acknowledge that the landscape of check printing and financial transactions has evolved significantly. Depending on your needs, modern alternatives might offer greater convenience, security, or efficiency.
Newer Versions of Microsoft Word
If you've upgraded from Word 2003, newer versions (like Word 2007, 2010, 2013, 2016, 2019, or Microsoft 365) offer improved template features, better graphical capabilities, and more stable document layouts. They often come with pre-installed templates or easier access to online template repositories that might include check designs, simplifying the process considerably. The interface for tables and text box manipulation is also generally more user-friendly.
Dedicated Check Printing Software
For businesses or individuals who frequently print checks, dedicated check printing software offers a more robust solution. These programs are specifically designed for printing checks, often integrate with accounting software, automatically handle check numbering, provide advanced security features, and ensure MICR line compliance. They eliminate the manual alignment and formatting challenges often associated with general-purpose word processors.
Online Check Printing Services
Several online services allow you to order custom checks with your bank details. These services are essentially digital versions of traditional check printers but offer more customization and often better pricing than bank-ordered checks. They are convenient if you don't want to deal with the printing process yourself and prefer professional-grade security features.
Digital Payment Methods
For many transactions, physical checks are becoming obsolete. Digital payment platforms like Zelle, PayPal, Venmo, bank transfers (ACH), and bill pay services offered by banks provide instant, secure, and often free ways to send money. These methods completely bypass the need for paper checks and are ideal for most everyday transactions.
Pre-Printed Blank Check Stock
If you prefer the control of printing at home but want to outsource the most critical part, you can order pre-printed blank check stock. This paper comes with your bank's routing and account numbers already printed in MICR-compliant ink at the bottom. You then use your Word template (or other software) to print only the variable information (date, payee, amount, memo, signature line) onto the checks. This combines the security of professionally printed MICR lines with the flexibility of on-demand printing.
While the Personal Check Template Word 2003 remains a viable option for those committed to the software, exploring these alternatives can help you choose the most appropriate and efficient method for your current and future financial needs.
Troubleshooting Common Issues with Personal Check Templates
Even with a meticulously crafted Personal Check Template Word 2003, you might encounter some common issues during the printing or usage phase. Knowing how to troubleshoot these problems can save you time and frustration.
1. Misalignment During Printing
This is perhaps the most frequent issue. What looks perfect on screen might shift when printed.
- Cause: Printer drivers, paper feed variations, or incorrect page setup.
- Solution:
- Print on Plain Paper First: Always do a test print on standard copy paper.
- Adjust Margins/Table Size: Slightly tweak your Word document's margins or the table dimensions. Even a tiny adjustment (e.g., 0.05 inches) can make a difference.
- Printer Settings: Check your printer's properties or preferences. Ensure it's set to print at actual size (100%) and that there are no "fit to page" or scaling options enabled.
- Manual Paper Feed: If your printer has a manual feed tray, try using it to ensure consistent paper insertion.
- Test with Official Check: Print your template and lay it over an existing bank check against a light source to pinpoint exactly where the misalignment is occurring.
2. MICR Line Not Reading (Check Rejected)
If your bank rejects your check due to MICR line issues, it's a serious problem.
- Cause: Incorrect font, incorrect numbers, or poor print quality.
- Solution:
- Verify Numbers: Double-check your routing and account numbers against an official bank check. Any transposition or single incorrect digit will cause rejection.
- Font Choice: While true MICR E-13B is best, if you're using an alternative like OCR-A Extended, ensure it's as clean and clear as possible.
- Print Quality: Ensure your printer's toner/ink is not low and that it produces sharp, non-smudged text. Laser printers generally produce clearer MICR lines than inkjet printers.
- Professional Help: If persistent, consider using pre-printed blank check stock where the MICR line is already professionally printed, or using a dedicated check printing software.
3. Text Overflows or Wraps Incorrectly
When you enter data, some fields might not fit or wrap to the next line when they shouldn't.
- Cause: Insufficient space in table cells or text boxes, or large font sizes.
- Solution:
- Adjust Cell Widths: In your table, drag the column borders to give more space to specific fields (e.g., payee line, written amount).
- Reduce Font Size: Slightly decrease the font size for the overflowing text.
- Word Wrap Settings (for Text Boxes): For text boxes, right-click, choose
Format Text Box, and adjust text wrapping options if necessary, though careful sizing is usually enough.
4. Template Accidental Changes
You open your saved template and accidentally type over part of the design.
- Cause: Saving changes directly to the template file (
.dot) instead of creating a new document from it. - Solution:
- Always Open as New Document: When you want to use your template, go to
File > New(orNew from Template) and select your check template. This creates a new document based on the template, leaving the original template file untouched. - Password Protect (Advanced): For more security, you can explore document protection features in Word 2003 (
Tools > Protect Document) to make certain parts of the template read-only.
- Always Open as New Document: When you want to use your template, go to
By systematically addressing these common issues, you can ensure your Personal Check Template Word 2003 remains a reliable tool for your check printing needs.
Conclusion
Creating and utilizing a Personal Check Template Word 2003 offers a powerful and flexible solution for managing your payments, whether for personal use or a small business. We've explored the compelling reasons to adopt this approach, from cost savings and immediate availability to custom branding opportunities. Understanding the intricate components of a bank check, from the date and payee lines to the critical MICR routing and account numbers, is the foundation for success.
Our step-by-step guide detailed the process of setting up your document in Word 2003, designing the check layout using tables, accurately placing all essential fields, and meticulously formatting the document. Crucially, we emphasized the importance of the MICR line and the need for precision in its creation. Furthermore, we delved into the significant legal, security, and practical considerations that accompany self-printed checks, stressing the use of security paper, diligent record-keeping, and understanding your bank's policies.
While modern alternatives like dedicated software or digital payment methods exist, the ability to generate your own checks using existing software like Word 2003 remains a valuable skill for many. By adhering to the guidelines outlined in this comprehensive article and paying close attention to detail, you can confidently produce your own legitimate, high-quality personal checks. This empowers you with greater control over your financial transactions and provides a reliable backup when traditional checkbooks aren't readily available.
0 Response to "Personal Check Template Word 2003"
Posting Komentar